Prerequisites:
- A device or single board computer with at least 512MB of RAM
- 2GB+ Micro SD Card
- Internet connection
- Router admin console access
Begin by ensuring a static IP address is set on your device (or make a DHCP reservation if applicable). If you're running Ubuntu Server 22.04.X as I am, you can set a static IP by modifying the config file for your device's respective network interface contained within the following directory /etc/netplan.
Because I'm doing so on a Le Potato SBC my interface is defined within a YAML file named eth0.yaml (along with many, many, others), you can confirm the interface your using by running ip addr | grep mtu, which will return all lines of information on interfaces containing MTU - Maximum Transmission Unit
Almost certainly you'll want the name of the first interface where MTU is defined at 1500 as shown below.

Now modify the appropriate YAML config file as discovered above via the following command sudo vim eth0.yaml.
I've already configured mine, but we will review the values of importance and where to locate them if you're unsure.
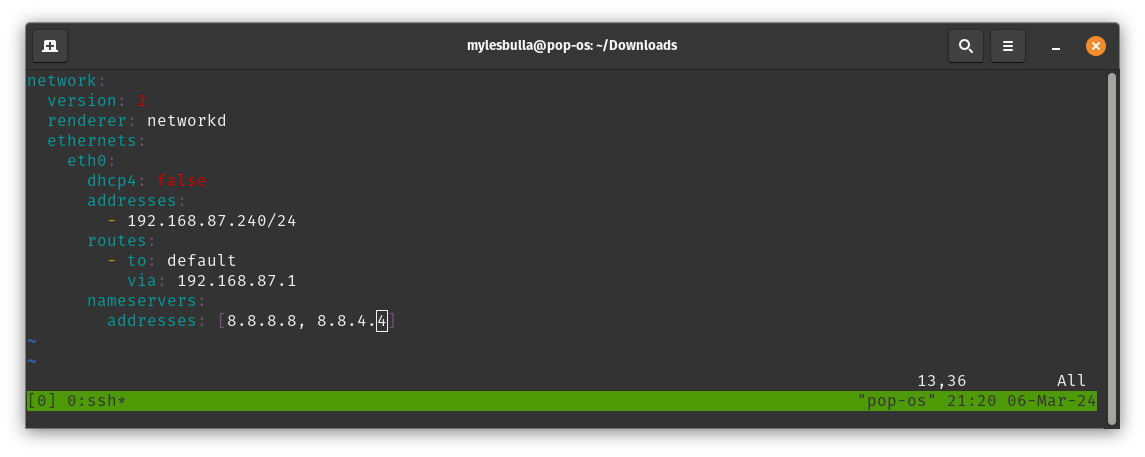
Press i (insert) inside of VIM to begin editing the file. dhcp4 must be set to false or no, we don't want our DHCP server assigning our device an IP automatically. For addresses, set a single address below to your desired ip, if unsure you can find your current DHCP assigned IP by running ip addr | grep "inet " | grep -v "127" | awk '{ print $2}' from your terminal and copy that IP address for use on the line below. The /24 refers to the subnet mask subnet mask in CIDR notation. Personally, I get 192.168.87.240/24, yours will differ.
Everything up to via should remain identical. For the address following via (the IP of the default gateway), you can run the commands shown via terminal traceroute 8.8.8.8 on an Linux distro or tracert 8.8.8.8 from a Windows machine to output the current path a packet will take to reach a specified destination in our case: 8.8.8.8 (Google's Public DNS). The first hop in the sequence will be your default gateway otherwise known as your router or route to the outside world well beyond the comfort of your little LAN.
 From the screenshot above it is the IP contained on line one - 192.168.87.1
Lastly, we'll set two more addresses in the nameservers section. I used Google's public DNS primary and secondary addresses 8.8.8.8 and 8.8.4.4, respectively.
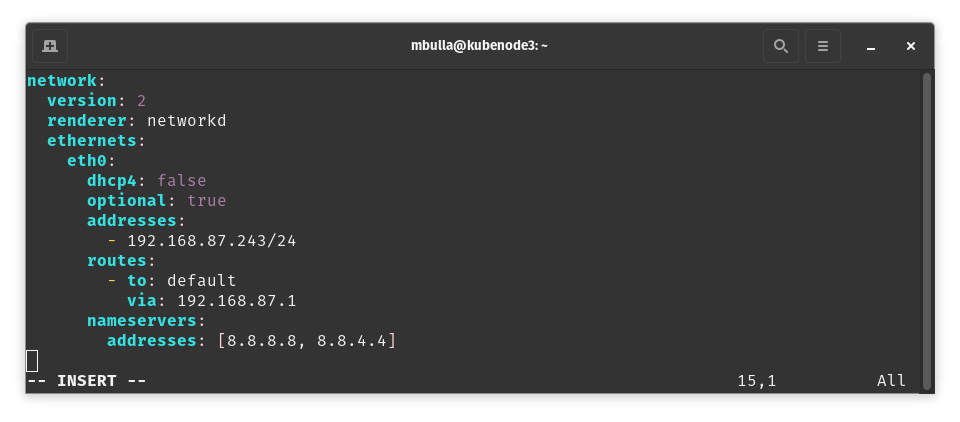
Go ahead and save your configurations by pressing esc followed by wq! to write/quit.
To apply our configuration run sudo netplan try. It provides the additional safety feature of reverting the change after 120 seconds automatically if you don't like that config or the changes leads to you locking yourself out of the remote server.
You should see the follow after running the command. Press enter and confirm your changes
Do you want to keep these settings?
Press ENTER before the timeout to accept the new configuration
Changes will revert in 120 seconds
To install Pi-Hole run the following command, this will pull the installation files from pi-hole.net and execute them via bash
sudo curl -sSL https://install.pi-hole.net | bash
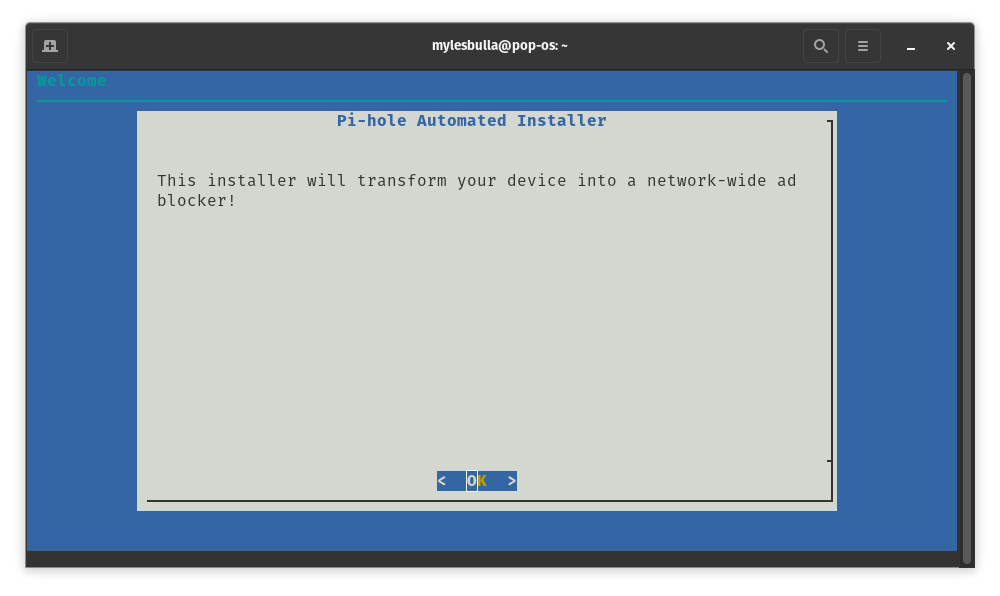
Select
- OK
- OK
- Continue (We've already done this)
- Upstream DNS Provider
- You can choose Google as I have or your preferred DNS provider (This is where your non-locally resolvable queries will go)
- OK
- Yes (Solid default adblock list)
- Yes Install Admin Web Interface
- The web interface is useful for a myriad of reasons, I highly suggest installing it.
- Yes Web Server (Required by web int.)
- Yes Enable Logging
- 0 Privacy Mode (Your choice but I want to see all queries, so I set to 0)
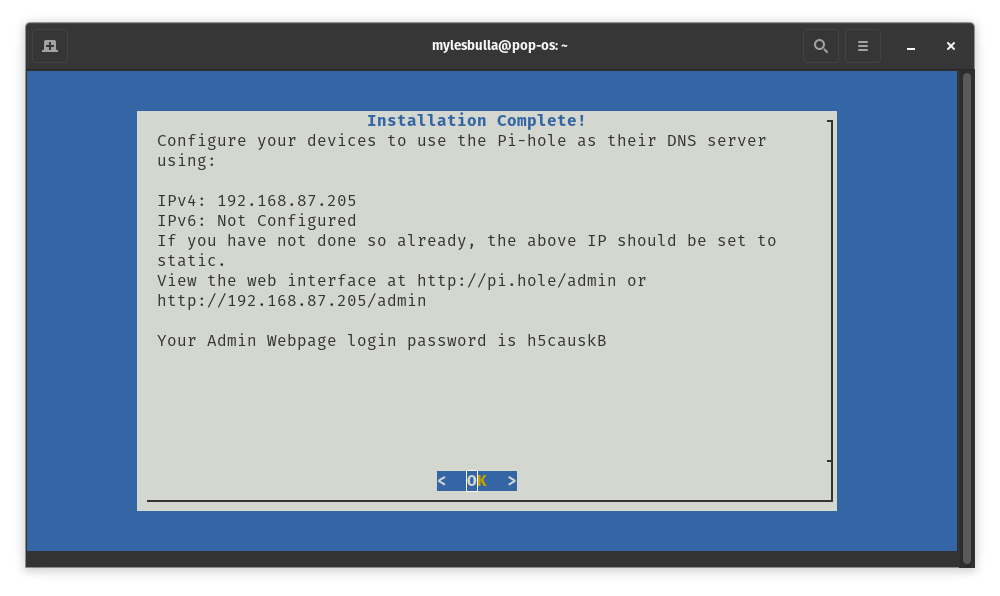
Now jot down the password in the final install screen, you'll need it to log into the web interface.
Now, this last step will vary greatly based on your home network configuration but the concepts are generally the same. You either want to have your DHCP Server provide the IP of the PI-Hole to all devices on your network as their primary DNS or set the primary DNS of your router to the PI-Holes IPs forcing all traffic routed through to hit our new PI-Hole DNS server.
Because I use Google Mesh for WI-FI and it's DNS handling cannot be disabled, so instead of setting it at on my router, I'll instead be configuring it on my WAP as shown in the screenshots below.
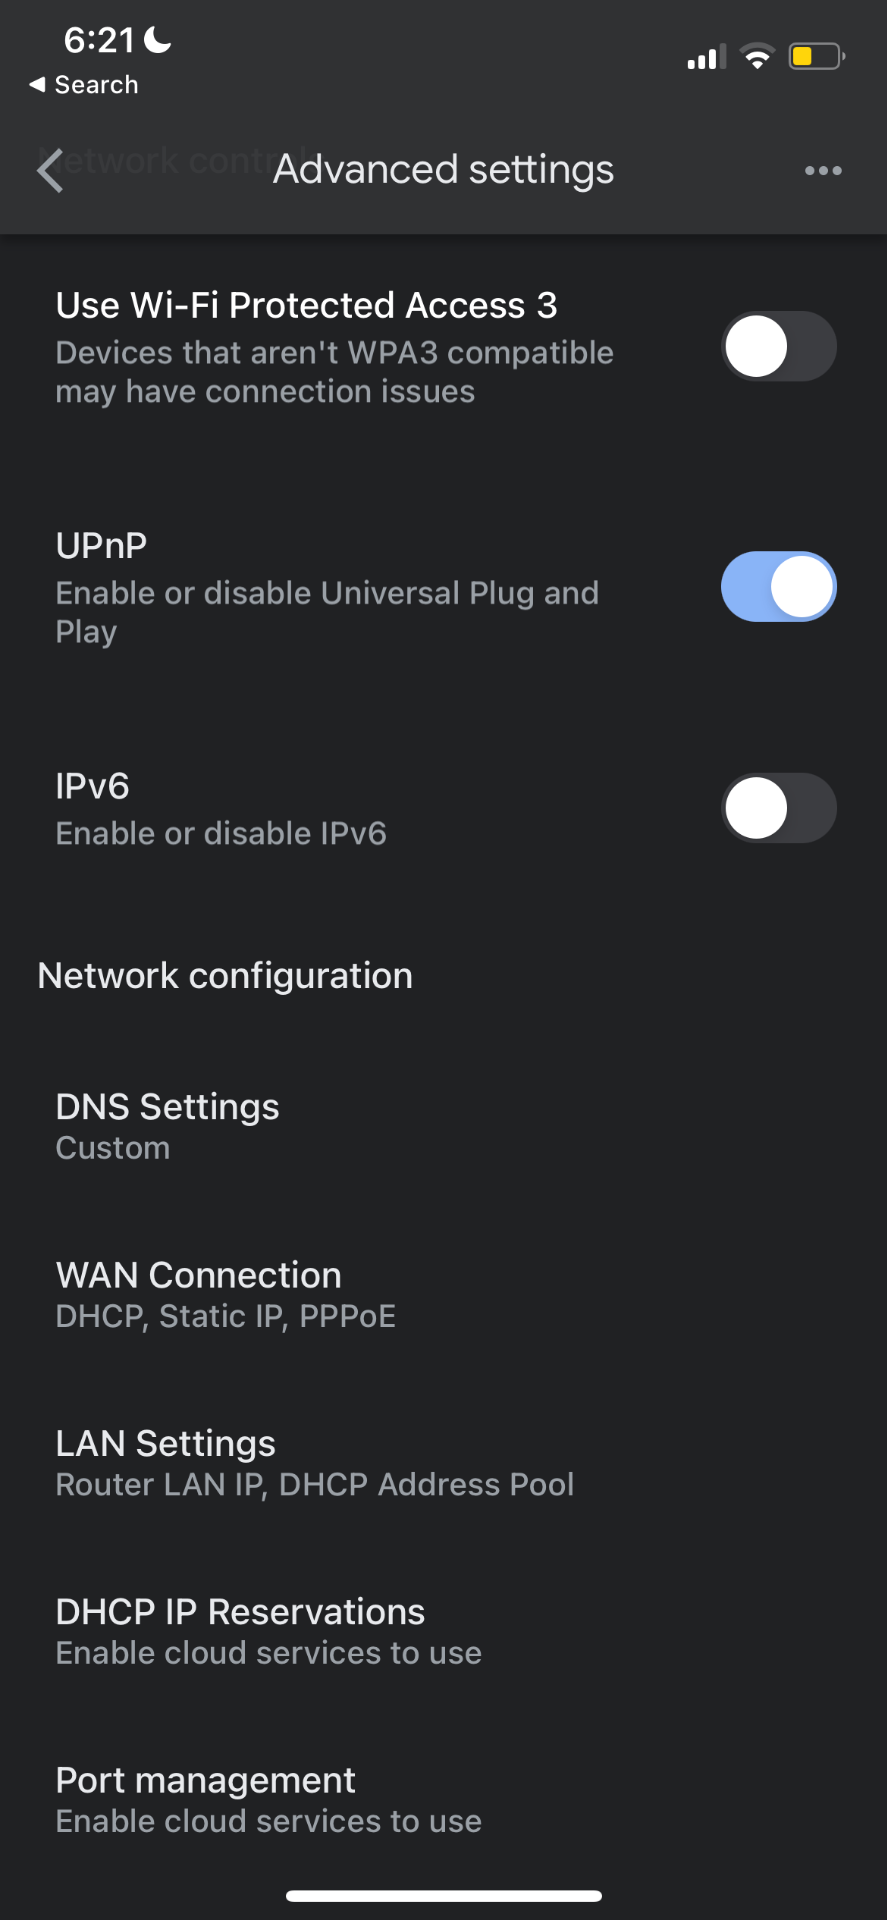
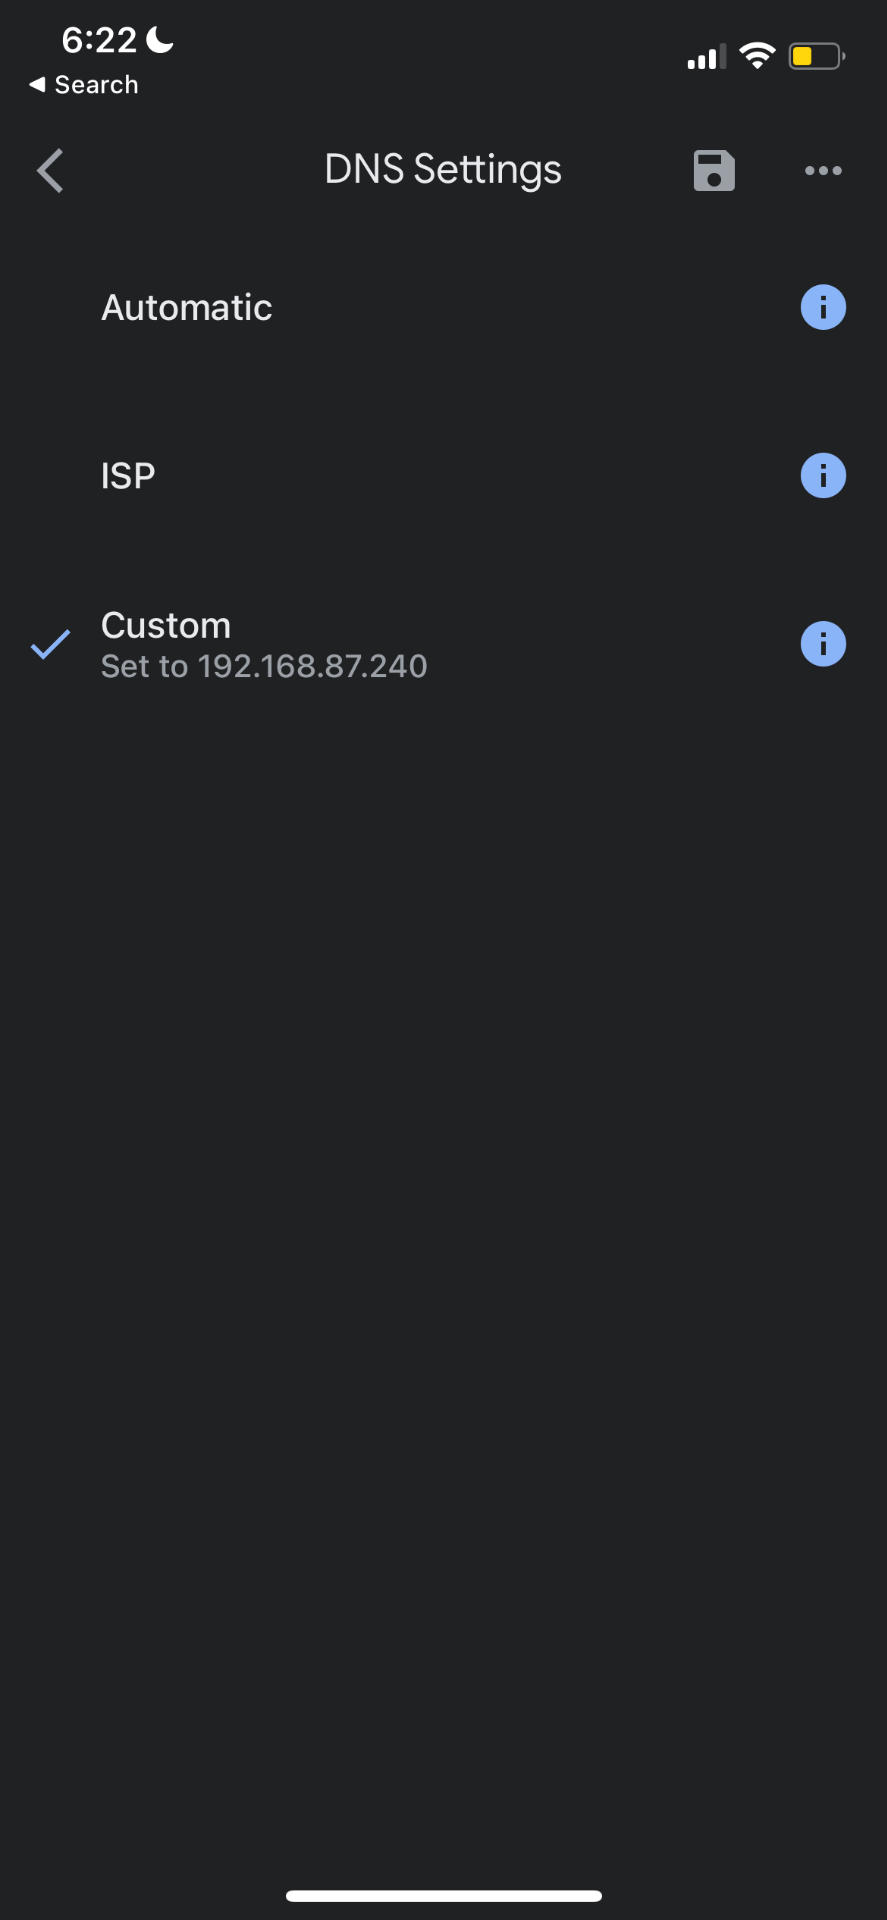
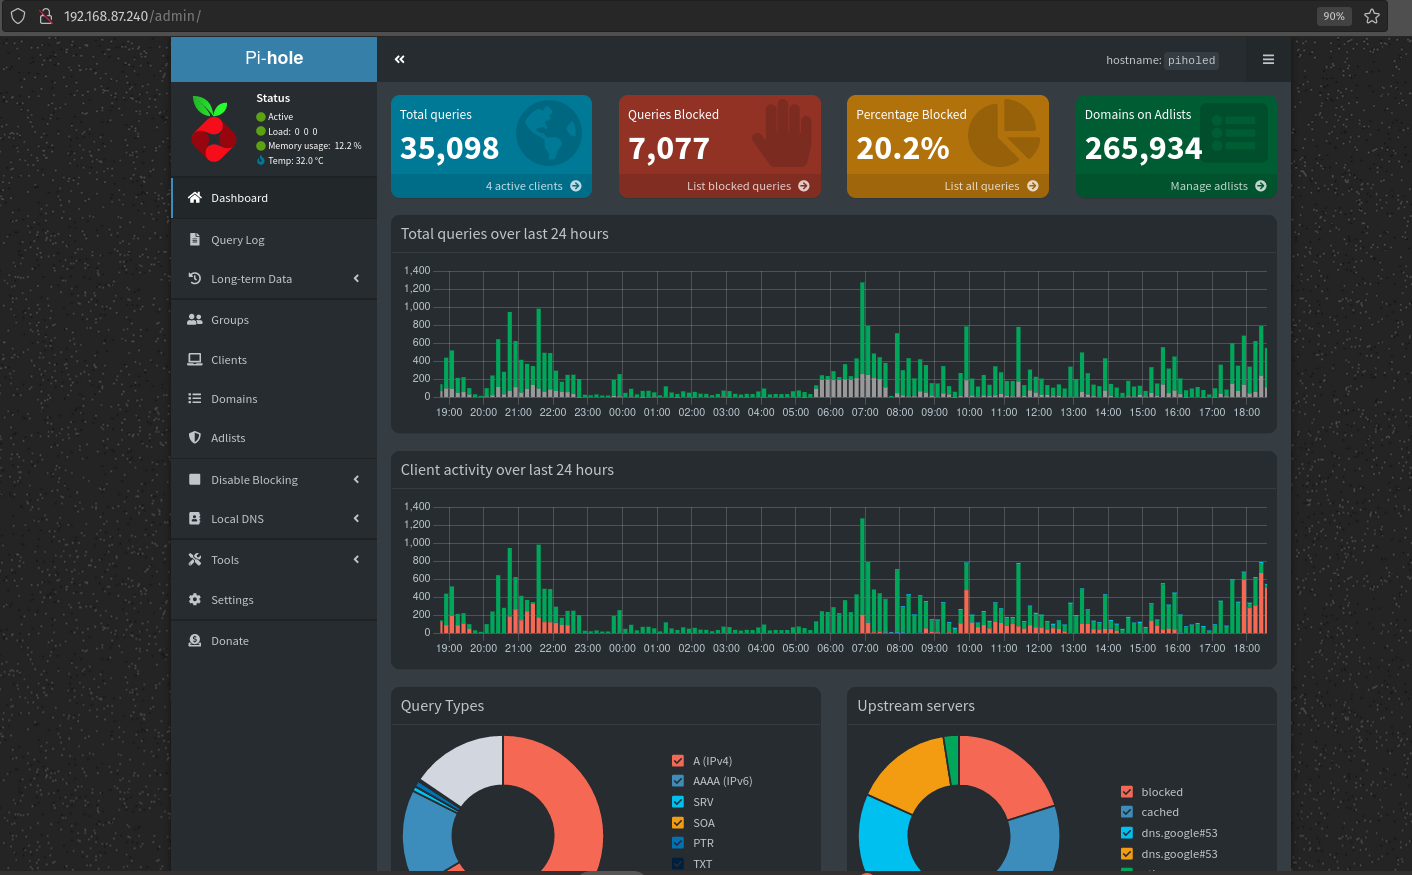
FInally. We can connect to our DNS server via the static IP we configure earlier from our web browser and see all the queries we're resolving as well as ads being blocked.
Tags: Raspberry-Pi